
Rupture disc installation
The installation steps that decide whether a rupture disc opens at its marked pressure or fails long before its time.

Good rupture disc installation comes down to a few disciplined steps: check the disc against the specification, never fit a damaged disc, respect the flow direction arrow and holder markings, make sure the flanges are clean and aligned, centre the gaskets and tighten the bolts evenly to the recommended torque. Wrong installation is the main cause of early disc failure, so these steps matter as much as the selection itself.
- Rupture disc installation: where most early failures begin
- Before the flanges open: storage, handling and checks
- Flow direction arrow and holder markings
- Clean, aligned flanges and centred gaskets
- Bolt torque: even, in sequence and to the recommended value
- Direct flange mounting versus a holder
- Pressure testing and commissioning after rupture disc installation
- After rupture disc installation: detection, records and spares
- How Dutch Valve Vision supports rupture disc installation
Unsure about the right choice?
Share your process data with our specialists. We check the numbers with you and give reasoned advice.
Rupture disc installation: where most early failures begin
Rupture disc installation looks like the simplest job on a shutdown list. Open two flanges, put in a new disc, close the flanges, done. Yet when a disc opens too early, leaks or fails to open at all, the cause is far more often found in the installation than in the disc itself. A disc that was selected with care, manufactured to a tight tolerance and tested by the manufacturer can still be ruined in the last few minutes of its journey.
Picture a maintenance crew on the night shift of a turnaround. The permit is signed, the vessel is isolated and the replacement disc has just come out of the store. It is cold, it is late and a long list of other jobs is waiting. That is precisely the setting in which a disc gets fitted upside down, a gasket slips off-centre or one bolt ends up tighter than the others. None of these mistakes is visible once the flanges are closed. All of them change how the disc behaves under pressure.
At Dutch Valve Vision we supply STRIKO rupture discs and holders as exclusive STRIKO agent for the Benelux. We see rupture disc installation as the final step of the selection process, not as a separate activity. This page walks through the steps in the order they happen on site, and explains why each one matters.
Before the flanges open: storage, handling and checks
Good rupture disc installation starts well before anyone touches a spanner. Discs are thin, precise components, and their burst pressure depends on the exact shape and condition of the membrane. Keep them in their original packaging until the moment of installation, store them in a clean and dry place and handle them by the edges. A fingerprint is harmless, but a scratch on the dome, a dent from a dropped tool or a crease from careless handling is not.
The rule is simple and absolute. A damaged disc must never be installed, because even small defects can change the burst pressure. If there is any doubt about the condition of a disc, it goes back in the box and a spare is used. That is one of the reasons we recommend keeping spare discs in stock for every critical position. A crew that has only one disc on hand is under pressure to fit it, whatever it looks like. Careful rupture disc installation is much easier when a second, undamaged disc is waiting on the shelf.
Before installation, check that the disc in your hands is the disc on the specification. Compare the diameter, the burst pressure, the specified temperature, the material and the disc type with the data sheet or the tag data of the position. Check that the holder type matches the disc. A forward acting disc belongs in a forward acting holder, a reverse buckling disc in a reverse buckling holder. It sounds obvious, yet mixing up discs of similar size but different pressure is one of the classic installation errors, especially when several positions are handled during the same shutdown.
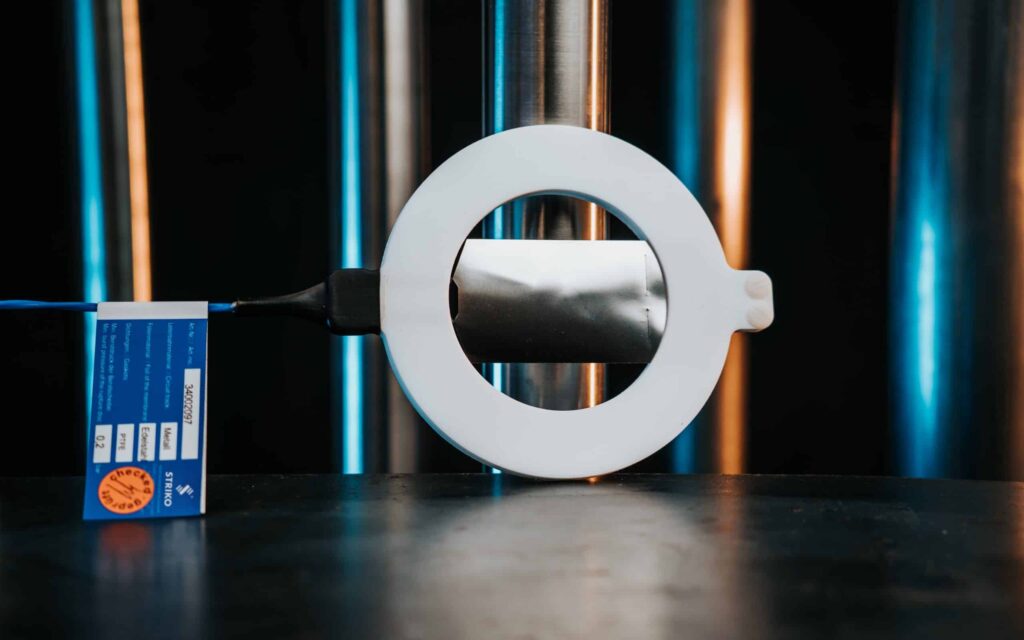
Flow direction arrow and holder markings
Every disc and every holder carries markings that show which way the process pressure acts. On the disc this is usually a flow direction arrow or a clear indication of the process side. On the holder it is a set of flow and installation markings. Our holders are designed with clear flow and installation markings for exactly this reason, so that the disc ends up in the right position without guesswork.
Getting the direction wrong has serious consequences. A reverse acting disc is designed to be loaded on its convex side. Fitted the wrong way round, it is loaded on the concave side instead and can open at a pressure far above its marking, which means the equipment it protects may be exposed to pressures it was never meant to see. A forward acting disc fitted upside down loses its intended behaviour as well. In both cases the disc no longer does what the calculation assumed.
During rupture disc installation it pays to check the direction twice, once when the disc goes into the holder and once when the holder goes into the line. The holder itself also has a direction. Its inlet and outlet side must match the piping, and a holder that is turned over between the flanges undoes all the care taken with the disc.
Clean, aligned flanges and centred gaskets
The second group of installation errors concerns the flanges. The disc or holder is clamped between two flange faces, and the quality of that clamping decides whether the disc is loaded evenly around its circumference. Dirt, old gasket material, corrosion products or burrs on the flange faces create uneven load points. Clean the faces thoroughly and inspect them before every rupture disc installation. A light scraper, a lint-free cloth and a good torch are usually all it takes, and the few minutes spent here protect everything that follows.
Alignment matters just as much. If the two flanges are not parallel, or if the pipe is pulling one flange sideways, the bolts cannot produce an even clamping force, however carefully they are tightened. The disc then sits under a bending load it was never designed for. On a new installation, poor alignment is usually a piping problem that should be solved in the piping, not forced out at the disc. On a replacement, check that nothing has shifted since the last disc was fitted.
Gaskets must be of the specified type and centred accurately. A gasket that protrudes into the bore can interfere with the opening of the disc, while one that is off-centre loads the seating area unevenly. The gasket should never touch the active part of the membrane. Our holders use sealing faces with controlled roughness and, depending on the medium, metal or soft seals, which helps prevent micro-leakage once the disc is in place.
Never install a damaged rupture disc
Respect the flow direction arrow
Tighten flange bolts evenly to torque
Holders with clear installation markings
Bolt torque: even, in sequence and to the recommended value
Bolt tightening is the step where most small mistakes become permanent. The goal is a uniform, reproducible clamping load on the disc. To achieve that, tighten the flange bolts evenly and to the torque values recommended for the disc and holder, working across the flange in a crossing pattern and in several passes rather than tightening one bolt fully before moving to the next.
Uneven torque produces uneven loading of the disc seat. On one side the disc may be clamped harder than intended, on the other side too loosely. The result can be leakage, premature fatigue or a burst pressure that differs from the marking. Overtightening is not a safety margin. It deforms the seat and can damage the disc just as surely as undertightening allows it to move.
Consistent bolt load is one of the design goals of our holders, and a good holder makes correct rupture disc installation much easier to repeat. Use a calibrated torque wrench, follow the manufacturer’s installation instructions and record the torque values applied. If the flange is lubricated, use the lubricant assumed in the torque values, because friction changes the clamping force produced by a given torque. The next crew to open the flanges will be grateful for that record.
Direct flange mounting versus a holder
Not every disc sits in a holder. Metal discs can be clamped directly between flanges in systems with straight pipe sections, and graphite rupture discs are often installed directly between standard ANSI or DIN flanges without a separate holder, which makes installation simpler and more economical. Our graphite discs are available from DN25 to DN400 and can be mounted either way.
Direct mounting puts even more weight on flange condition, gasket centring and torque, because there is no holder to guide the disc into position. The best practice list for graphite discs is short and clear: check diameter and burst pressure for the application, make sure the flanges are clean and aligned, place the gaskets accurately and centre them, respect the flow direction arrow and tighten the flange bolts evenly to the recommended torque.
A holder adds a layer of protection. It protects the disc during installation, ensures correct positioning and makes it possible to integrate pressure or signal detection. For pulsating pressure, cyclic loading or positions where process integrity matters most, we generally advise a holder. The holder is also reusable. Maintenance is limited to visual inspection and periodic replacement of the disc, and holders are designed for long-term reuse without loss of performance.
Pressure testing and commissioning after rupture disc installation
A new or modified system is usually pressure tested before it goes into service, and that test deserves a moment of thought during rupture disc installation. If the test pressure approaches or exceeds the burst pressure of the disc, the disc will open during the test or be weakened by it. The usual practice is to remove the disc during the test and fit a blind or a test plate in its place, or to install the disc only after the test has been completed. Which route applies depends on the test procedure and the position, and it should be agreed before the test starts.
Commissioning brings its own risks. Steam out, purging and first filling can create vacuum or pressure transients that the disc was not selected for. A disc on a vessel that is steamed and then cooled with closed vents can be pulled the wrong way unless it has vacuum support or a vacuum suitable design. Checking these first days of operation is part of a complete rupture disc installation plan, not something to leave to chance.
After rupture disc installation: detection, records and spares
Once the flanges are closed, the rupture disc installation is not quite finished. If the position has a burst detection sensor, reconnect it and test the signal to the control system. Electrical detection with a loop that breaks, or magnetic detection with a field that changes when the disc moves, only helps if the signal actually reaches the PLC, SCADA or DCS. Fail-safe designs report a defect in the sensor itself, which is worth checking during commissioning.
Record what was installed and how. Note the disc type, the burst pressure and temperature, the batch or tag data, the holder, the gasket type and the torque values. Good records make the next replacement faster and help any investigation if a disc opens unexpectedly. They also support audits and compliance, especially on positions covered by the Pressure Equipment Directive.
Finally, replenish the spare. A disc that has just been used from stock should be reordered straight away, so the next crew does not face the same pressure to fit whatever is available.
How Dutch Valve Vision supports rupture disc installation
Dutch Valve Vision is based in Monster in the Netherlands and is the exclusive agent of STRIKO Verfahrenstechnik GmbH for the Netherlands, Belgium and Luxembourg. STRIKO has been active in rupture discs since 1974 and works to a philosophy of testing, evaluating and recalibrating.
We supply the disc, the holder and optional burst detection as a matched set, with material certificates to EN 10204 3.1, pressure calculations, inspection reports and traceability. The holders follow ASME Section VIII, EN ISO 4126 and PED 2014/68/EU, with ATEX where relevant. When you plan a replacement, send us the existing tag data. For a new position we need the medium, the operating pressure including peaks, the required burst pressure, the temperatures, the connection and the installation space. We will make sure the right disc arrives on site and help your team with the installation steps that follow. For rupture disc installation on critical positions, supplying disc and holder together is the surest way to get a matching, correctly marked set.
Contact us at sales@dutchvalvevision.com or on +31 (0)70-2210560, Monday to Friday from 09:00 to 17:00. Dutch Valve Vision works with an ISO 9001 certified quality management system, certified by KIWA.
Specification ready? We will prepare a targeted quote.
Send us medium, pressure, temperature and connection. Our specialists come back with a matching proposal.
Frequently asked questions about rupture disc installation
Question not listed? Our specialists are happy to help.
What is the most common mistake in rupture disc installation?
Fitting the disc in the wrong direction is one of the most serious and most common mistakes. A reverse acting disc fitted the wrong way round can open at a pressure far above its marking. Other frequent errors include installing a damaged disc and tightening the bolts unevenly. Dirty or misaligned flanges and off-centre gaskets also cause problems. Mixing up discs of similar size but different burst pressure happens too, especially during busy shutdowns. Each of these errors changes how the disc behaves under pressure. Most of them cannot be seen once the flanges are closed. That is why a short checklist before and during installation pays off.
Can I install a disc that has a small scratch or dent?
No, a damaged disc must never be installed. Even small defects can change the burst pressure. A scratch or dent on the membrane can create a weak point where the disc opens too early. It can also change the shape of a domed disc and affect how it reverses or tears. The risk is not visible from the outside once the disc is fitted. If there is any doubt, use a spare disc instead. That is why we recommend keeping spare discs in stock for critical positions. The cost of a spare is small compared to an unplanned opening.
Why does the flow direction arrow matter so much?
The arrow shows which side of the disc must face the process pressure. Forward acting and reverse acting discs are designed to be loaded on a specific side. A reverse acting disc loaded on the wrong side can open at a much higher pressure than marked. That can expose the protected equipment to pressures it was not designed for. A forward acting disc fitted upside down also loses its intended behaviour. Holders carry flow and installation markings for the same reason. Check the direction when the disc goes into the holder and again when the holder goes into the line. Two checks take seconds and prevent a serious error.
What torque should I use for the flange bolts?
Use the torque values recommended for the specific disc and holder combination. Those values are part of the manufacturer’s installation instructions. The bolts should be tightened evenly in a crossing pattern and in several passes. Tightening one bolt fully before the next leads to uneven clamping. Uneven clamping can cause leakage, fatigue or a changed burst pressure. Overtightening is not safer, because it can deform the seat and damage the disc. A calibrated torque wrench helps to achieve consistent results. Record the values used so the next installation can follow the same procedure.
Do I always need a holder for a rupture disc?
Not always, because some discs can be clamped directly between flanges. Metal discs can be mounted directly in systems with straight pipe sections. Graphite discs are often installed directly between standard ANSI or DIN flanges. A holder protects the disc during installation and ensures correct positioning. It also allows integration of burst detection. For pulsating pressure, cyclic loading or critical positions we generally advise a holder. The holder is reusable and only the disc is replaced after an event. We can advise which option suits your position.
Can a rupture disc be reinstalled after it has been removed?
Manufacturers generally advise against reinstalling a disc that has been clamped and then removed. The clamping load leaves its mark on the seating area of the disc. Refitting it may not reproduce the original loading. A disc that has burst can of course never be reused. When a position is opened for inspection, it is good practice to fit a new disc. That is another reason to keep spares available. The holder itself can be reused after inspection. Discuss the procedure for your specific disc type with us when in doubt.
Which gasket should be used with a rupture disc?
Use the gasket type specified for the disc and holder combination. The gasket must suit the medium, the temperature and the pressure. It must be centred accurately and must not protrude into the bore. A gasket that touches the active part of the membrane can interfere with the opening. An off-centre gasket loads the seat unevenly. Our holders use sealing faces with controlled roughness and metal or soft seals depending on the medium. Leak detection ports can be integrated where needed. If you are unsure which gasket applies, ask us before the installation.
What should be recorded after installing a rupture disc?
Record the disc type, burst pressure, specified temperature and batch or tag data. Note the holder type, the gasket type and the torque values applied. Include the date and the name of the person or team who carried out the work. If burst detection is present, record that the signal was tested. These records speed up the next replacement. They also help any investigation if a disc opens unexpectedly. Auditors often ask for this information on safety accessories. A simple, consistent record for each position is enough.
Plan your next disc replacement with us
Send us the tag data of the installed disc and holder, or the process data for a new position. We supply the matching STRIKO disc and advise on the installation steps.
- +31 (0)70-2210560
- sales@dutchvalvevision.com
- Vlotlaan 641, 2681 TZ Monster, the Netherlands
- Mon-Fri 09:00-17:00